
Shrubs
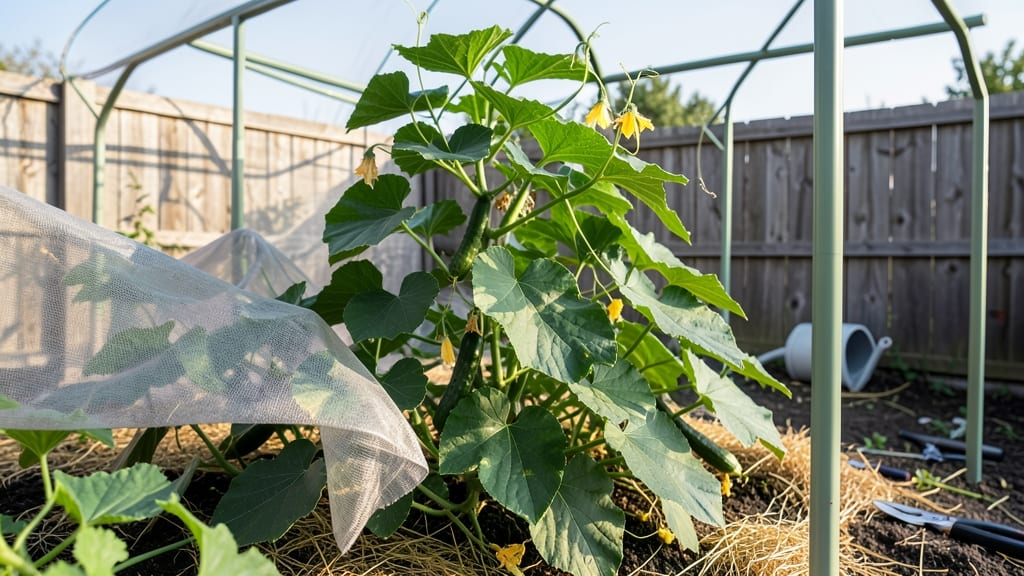
My DIY greenhouse shade cloth saved my heat-loving peppers from bolting last summer. 🌱 The right shade cloth isn't just about blocking sun—it's about creating the perfect microclimate where plants thrive without wilting or overheating.
I started with a simple frame and 30% shade cloth, and now my greenhouse stays 10-15°F cooler on scorching days while still getting plenty of light.
The secret lies in matching cloth density to your plants' needs: 30% for seedlings, 50% for heat-sensitive greens, and 70% for tropicals. You'll see stronger stems, fewer pests, and plants that actually produce instead of struggling.
My setup cost less than $50 and took a weekend to install—no fancy tools required. Once you've got it up, you'll notice the difference immediately: fewer sunburned leaves, healthier growth, and longer harvest seasons.
The cloth also filters UV rays, which means less stress on your plants and more energy going into fruit and flowers. Works for retrofitting existing greenhouses, building new ones, or even shading raised beds. Here's how to make it work for your space!
📚 In This Guide
- What you need
- Instructions
- Tips and common mistakes
- Wrapping up and next steps
What you need
- ● Shade cloth fabric: Choose a knitted polyester or aluminet shade cloth (30-50% shade for most plants; 50-70% for delicate varieties). Measure your greenhouse’s surface area (length × width) and add 10% for overlap. Example: A 10’×10’ greenhouse needs ~110 sq. ft. of cloth.
- ● Frame or hoops: PVC pipes (½” or ¾” diameter), wooden dowels, or metal rods (1”–2” thick). Cut to match your greenhouse’s width (spaced 2–4 ft apart).
- ● Fasteners: Zip ties (heavy-duty, 12”–18”), staples + staple gun, or screws + drill (for permanent setups).
- ● Support ropes/cables: UV-resistant bungee cords or nylon rope (¼” thickness) to secure hoops to the greenhouse frame.
- ● Measuring tape, scissors or utility knife, and marker for cutting cloth.
- ○ Optional tools: Drill + bits (for pre-drilling PVC/wood).
- ● Level (to ensure even hoop placement).
- ● Heat gun (to shrink fabric edges for a cleaner finish).
- ○ Optional upgrades: Ventilation kit: Magnetic or zippered vents for airflow.
- ● Reflective tape: Adds extra UV protection to edges.
- ● Corner weights: Keeps cloth taut in windy areas.
Step-by-Step guide to building a customizable DIY greenhouse shade cloth
Here’s how to create a UV-blocking shade solution that protects your greenhouse plants without breaking the bank.
🪴 Step 1: Measure and Select Your Shade Cloth Material
Start by measuring the area you need to cover—length, width, and height of your greenhouse frame. For a 4-foot-tall greenhouse, you’ll typically need two panels (one for the roof, one for the sides) with 30-50% shade cloth for moderate UV protection. I recommend aluminet shade cloth because it’s lightweight, durable, and blocks 30-50% of sunlight while allowing airflow.
Cut the material to size using scissors or a utility knife, leaving 2-3 inches extra on all sides for securing. If your greenhouse has a sloped roof, measure diagonally to avoid gaps. Test-fit the panels before attaching—this ensures a snug fit without stretching the fabric.
✂️ Step 2: Attach a Support Frame for Stability
Shade cloth alone sags under wind or rain, so build a lightweight support frame using 1x2-inch PVC pipes or bamboo stakes. For a 4-foot-tall greenhouse, assemble a rectangular frame around the perimeter, 6 inches taller than your greenhouse to allow for draping. Secure the frame with zip ties or hose clamps at each corner.
If your greenhouse has a gable roof, add a horizontal PVC pipe across the top to create a ridge. This prevents the shade cloth from pooling water and keeps it taut. Use staple guns to attach the shade cloth to the frame, starting from the top center and working outward to avoid wrinkles.
💧 Step 3: Install the Shade Cloth with Adjustable Fasteners
Attach the shade cloth to the frame using grommet strips or heavy-duty staples, spacing them every 12 inches for even tension. For side panels, leave the bottom 12 inches loose—this allows airflow while still blocking UV rays. If your greenhouse has roll-up sides, install D-rings along the top edge and use retractable cords for easy removal.
For roof panels, secure the edges tightly but leave small vents (covered with fine mesh) near the base to prevent overheating. Test the setup by gently pulling on each corner—if the cloth sags more than 6 inches, add extra support stakes or adjust the frame.
☀️ Step 4: Adjust Shade Levels for Seasonal Needs
Greenhouses need flexible shade—too much in winter stunts growth, while too little in summer causes stress. Use adjustable clips or hooks to roll up or fold down the shade cloth as needed. For spring and fall, keep it at 30% coverage; in peak summer, increase to 50%. Watch your plants: wilting or yellowing leaves signal it’s too hot, while slow growth means it’s too dark.
If your shade cloth gets dirty, rinse it with a hose every 2-3 weeks—dirt reduces effectiveness. Store extra panels in a dry, shaded area when not in use to extend their lifespan. A little maintenance keeps them blocking 90% of harmful UV rays for years.
⏰ Step 5: Monitor and Fine-Tune for Plant Health
Check your greenhouse daily during heatwaves—if the air feels hotter than 90°F, adjust the shade immediately. Healthy plants under shade cloth should have deep green leaves and steady growth. If you notice bleached or crispy edges, the UV exposure is still too high—add an extra layer or switch to 60% shade cloth.
For delicate plants like lettuce or basil, combine shade cloth with drip irrigation to keep soil moist without overheating. In winter, remove the shade entirely unless you’re growing tender crops that need extra warmth. The key is balance—too little shade risks sunburn, while too much slows photosynthesis.
Tips & tricks for customizable greenhouse UV protection
Building a shade system that truly works takes more than just throwing up some fabric—here’s how to get it right the first time.
Material Selection: When choosing between 30% and 50% shade cloth, consider your climate and plant types. For heat-sensitive plants like peppers or cucumbers, opt for the 50% coverage in peak summer. The 30% cloth works better for spring/fall or hardier plants like tomatoes. I’ve found that aluminet holds up best against UV degradation over time compared to cheaper polyester blends.
Frame Stability: The 6-inch taller frame mentioned in Step 2 is non-negotiable for wind resistance. If you’re in a particularly breezy area, add diagonal bracing between corners using additional 1x2-inch PVC cut at 45-degree angles. For temporary setups, bamboo stakes work well but may need weighted anchors (like bricks) to prevent tipping during storms.
Adjustable Installation: For side panels, the bottom 12 inches loose isn’t just about airflow—it’s a heat escape valve. In 90°F+ conditions, this gap prevents trapped heat from baking your plants. Pro tip: Add fine mesh vents (like window screen) to the bottom edges of roof panels to maintain airflow while blocking light. These should be covered with hardware cloth to keep pests out.
Seasonal Transition: The shift from 30% to 50% coverage between seasons is crucial, but don’t wait until you see wilting—act 2 weeks before the solstice. For example, if your last frost is March 15th, start with 30% coverage by April 1st. Use retractable cords with adjustable hooks to make seasonal changes a 5-minute task rather than a project.
Pro Tips for Diy Greenhouse Shade Cloth
- Building a shade system that truly works takes more than just throwing up some fabric—here’s how to get it right the first time.
- Material Selection: When choosing between 30% and 50% shade cloth, consider your climate and plant types.
- Frame Stability: The 6-inch taller frame mentioned in Step 2 is non-negotiable for wind resistance.
Frequently asked questions
Got questions about DIY greenhouse shade cloth? You’re not alone! Here are answers to the most common concerns—from setup to troubleshooting—to help you keep your plants thriving under the sun.
What’s the best shade cloth percentage for my greenhouse plants?
The ideal percentage depends on your plants’ needs and climate. 30-50% shade cloth works well for most vegetables and flowers, reducing heat while allowing enough light. Delicate plants (like lettuce or basil) may need 50-70%, while heat-tolerant plants (like tomatoes or peppers) can handle 20-30%. Start with a lower percentage and adjust as needed!
How do I attach shade cloth to my greenhouse frame without damaging it?
Use clips, hooks, or zip ties to secure the cloth without puncturing the frame. For a temporary setup, bungee cords work great. If your greenhouse has a hoop or polycarbonate structure, opt for adjustable tension wires or corner brackets for a snug, wind-resistant fit. Avoid nails or screws—they can weaken the frame over time!
Can I use shade cloth year-round, or only in summer?
Shade cloth is seasonal, but timing depends on your goals. Use it spring through fall to protect plants from intense sun, but remove it in winter to maximize light for growth. In hot climates, some gardeners leave it up year-round at a lower percentage (20-30%) to filter UV rays. Monitor your plants—if they look leggy or pale, they need more light!
What’s a good alternative if I can’t find shade cloth?
If shade cloth isn’t available, try these DIY fixes:
- Frosted plastic sheeting (30-50% light reduction)
- White bedsheets or old curtains (lightweight and breathable)
- Bamboo or reed mats (natural and adjustable)
- Reflective bubble wrap (redirects heat away from plants)
Why is my shade cloth tearing or sagging after a few weeks?
Sagging or tearing often happens due to UV degradation, wind strain, or poor attachment. To fix it:
- Replace the cloth if it’s brittle or yellowed (UV-damaged cloth loses effectiveness).
- Re-secure it with tighter clips or add support wires along the length.
- Check for sharp edges on the frame that might be cutting the fabric.
- Consider a double-layer setup for high-wind areas.
Wrapping up and next steps
Building your own DIY greenhouse shade cloth is a game-changer for protecting your plants from harsh UV rays while keeping costs low and customization high! 🌿 With the right materials and a little effort, you’ve got a practical solution that extends the life of your shrubs and veggies—no green thumb required.
Whether you’re a seasoned gardener or just starting out, this project proves that simple fixes can yield big results.
Ready to take the next step? Grab your supplies, follow the steps, and watch your plants thrive under their new UV shield. Happy gardening! 🌱