
Vegetables
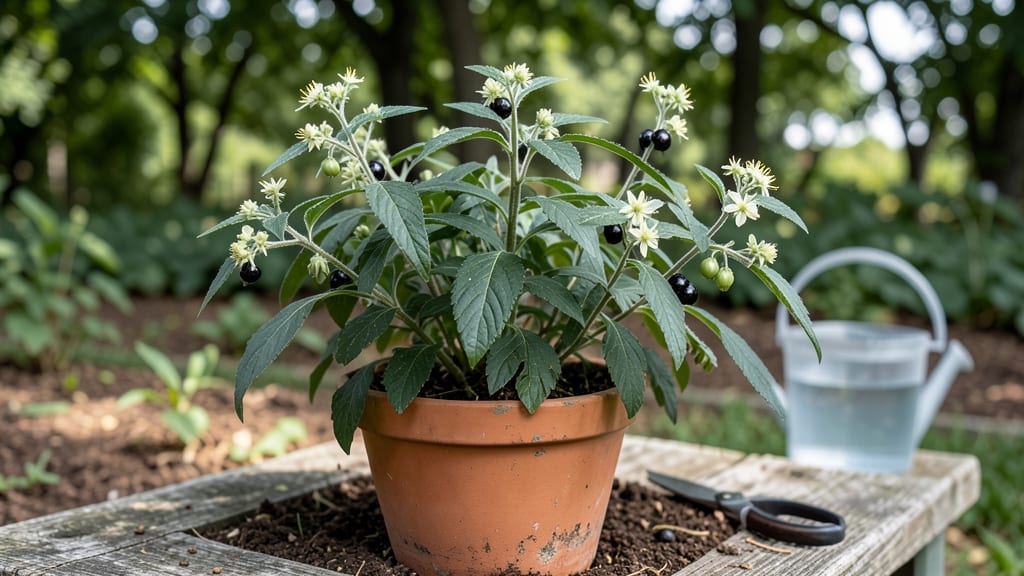
Growing black nightshade (Solanum nigrum) lets you harvest wild edible greens in just 60 days—but only if you know how to distinguish it from toxic lookalikes. 🌱 I’ve grown this fast-spreading plant for years, and the key is starting with fresh seeds or cuttings from a trusted source.
The young leaves pack a peppery flavor and are packed with nutrients, but the ripe berries are off-limits (they’re toxic). This plant thrives in full sun to partial shade and tolerates poor soil, making it perfect for neglected corners of the garden.
It spreads aggressively, so contain it in raised beds or let it naturalize in wild areas. Water consistently but avoid soggy soil—root rot is the biggest threat. Harvest leaves before the plant flowers for the best flavor and texture.
You’ll end up with a self-sustaining crop that requires almost no maintenance after establishment. The leaves can be used like spinach in salads or sautéed dishes, and the plant even attracts pollinators. Just remember: never consume the berries, and always confirm identification before harvesting.
📚 In This Guide
- What you need
- Instructions
- Tips and common mistakes
- Wrapping up and next steps
What you need
- ● Seeds: 50–100 Solanum nigrum seeds (organic, non-GMO preferred). Pro tip: 💡 Collect seeds from mature berries or buy from a reputable supplier.
- ● Growing Containers or Garden Bed: For containers: 5–10 gallon pots (1–2 plants per pot) with drainage holes.
- ● For in-ground: Well-draining soil in a sunny spot (6+ hours of sunlight daily).
- ● Potting Mix: 1–2 bags of high-quality, well-draining soil (e.g., 60% topsoil, 30% compost, 10% perlite/sand).
- ● Watering Can or Hose: With a gentle spray nozzle for seedlings.
- ● Hand Trowel – For transplanting seedlings.
- ○ Gloves – Protect your hands from prickly stems (optional but helpful!).
- ● Fertilizer: Balanced organic fertilizer (e.g., 10-10-10) or compost tea (apply lightly every 3–4 weeks).
- ● Mulch – Straw or shredded leaves to retain moisture (especially in hot climates).
- ● Pruning Shears – To trim leggy stems and encourage bushier growth.
- ○ Row Cover or Netting – Optional for pest protection (e.g., from birds or insects).
- ● 🌡️ Climate: Thrives in USDA Zones 3–11. Ideal temps: 60–80°F (15–27°C). Avoid frost.
- ● 💧 Watering Schedule: Keep soil consistently moist but not soggy (especially during seedling stage).
- ● 🕒 Time Commitment: 60–90 days to harvest (fast-growing!).
- ● 🚫 Caution: All parts of the plant are edible, but raw leaves may cause mild stomach upset in some people. Cooking removes toxins!
Step-by-step guide to cultivating black nightshade (Solanum nigrum)
This fast-growing wild edible thrives with minimal fuss—here’s how to coax it from seed to harvest in just two months.
🌱 Step 1: Select and Prepare Planting Sites
Black nightshade adores disturbed, nutrient-rich soil with excellent drainage. Scout for areas with partial shade or dappled sunlight—it tolerates full sun but may bolt faster in extreme heat. I always choose spots with loose, slightly acidic soil (pH 6.0-6.8) where weeds have been cleared. Test your soil by squeezing a handful: if it crumbles easily when dry and holds moisture without clumping, it’s perfect.
If your soil is heavy clay, amend it with 2 inches of compost and 1 inch of coarse sand per square foot. Nightshade’s shallow roots need air, and waterlogged conditions will rot them overnight. Mark your planting area with stakes to avoid disturbing roots later—this plant spreads aggressively once established.
🌱 Step 2: Sow Seeds Directly After Last Frost
Black nightshade seeds germinate best when sown ½ inch deep after the soil reaches 60°F. Scatter seeds 6-8 inches apart—they self-thin naturally, so don’t bother spacing them perfectly. I like to plant in 2-foot rows for easier harvesting later. Cover seeds lightly with soil and mist the area until the surface looks uniformly damp but not soggy.
Germination takes 7-14 days, depending on warmth. You’ll spot tiny round leaves (cotyledons) first—don’t be tempted to thin yet. Wait until seedlings have 2-3 true leaves (the larger, serrated ones) before carefully removing weaker plants. This ensures strong root systems for your 4 plants (or more if you’re ambitious).
☀️ Step 3: Maintain Moisture and Monitor Growth
Water deeply 2-3 times per week, aiming for 1 inch of water per week. Nightshade’s shallow roots mean frequent, shallow watering prevents stress. You’ll know moisture is right when the top ½ inch of soil feels damp—not wet, not dry. Mulch with 2 inches of straw immediately after watering to retain moisture and suppress weeds, which compete aggressively with this fast grower.
Watch for white flowers appearing 4-6 weeks after sowing. These signal the plant is ready to fruit. If temperatures exceed 85°F, provide afternoon shade to prevent bolting—your 60-day harvest window hinges on keeping plants cool enough to produce berries. Hand-pollinate by gently shaking stems if no bees visit your garden.
✂️ Step 4: Harvest Berries at Peak Ripeness
Black nightshade berries ripen from green to glossy black in 10-14 days after flowering. Harvest when fully black—green berries contain toxic solanine. I use sterilized scissors to snip clusters (never pull stems, which damages roots). Wear gloves if you’re sensitive to the plant’s mild irritants. Yield averages ½ pound per plant under ideal conditions.
Store harvested berries in a paper bag in the fridge for up to 5 days. For long-term storage, dry them on a screen in a 65°F space until shriveled. Cooking destroys solanine, so simmer berries for 10 minutes before using in sauces or teas. Never eat raw green berries—this is the only critical safety rule for this otherwise resilient plant.
🌿 Step 5: Extend the Harvest Season
Black nightshade thrives as a perennial in USDA zones 5-10. After your first harvest, let 2-3 plants reseed naturally for next year’s crop. In colder zones, mulch heavily with 4 inches of straw before frost to protect roots. Cut back stems to 2 inches in early spring—new shoots emerge within 2 weeks of warming soil.
To prevent spread, remove unwanted seedlings in early spring. This plant’s aggressive nature makes it a great weed suppressor, but it can overtake garden beds if unchecked. I designate a 3-foot square patch for my nightshade and let it thrive without interference—it’s one of the most rewarding low-maintenance edibles I grow.
Tips & tricks for perfect black nightshade cultivation
Took me years of trial and error to master these secrets—here's how to avoid the common pitfalls and maximize your harvest.
Soil Prep Secret: The key to successful nightshade cultivation lies in that initial soil preparation. Don't just amend clay soil with compost—work in 1 inch of coarse sand per square foot to create that perfect airy texture. I've seen roots rot overnight when planted in unamended heavy soil, even with regular watering. Test your soil's moisture retention by squeezing a handful: it should crumble when dry but hold shape when damp—this is the Goldilocks zone for nightshade's shallow roots.
Germination Strategy: Timing is everything when sowing those ½ inch deep seeds. Wait until soil reaches exactly 60°F—any cooler and germination slows dramatically. I use a soil thermometer for precision, especially in spring when temperatures fluctuate. The 7-14 day germination window can feel like forever, but resist the urge to check daily—disturbing the soil can prevent seeds from making contact with moisture. Mark your planting spots with biodegradable flags so you don't accidentally till them later.
Heat Management: When temperatures creep above 85°F, your plants will bolt faster than you can say "harvest." I've lost entire crops to summer heat, so I always install shade cloth (30-40% coverage) during afternoon hours. The 60-day harvest window hinges on keeping plants cool enough to produce berries—don't let them get stressed. Hand-pollination becomes crucial in hot weather when bees are less active; simply give the stems a gentle shake when white flowers appear to help with fertilization.
Harvesting Technique: Those 10 minutes of simmering are non-negotiable for safety, but harvesting properly makes all the difference. Use sterilized scissors to snip berry clusters rather than pulling stems—this prevents root damage and encourages more production. I wear gloves when handling the plants as some people develop mild skin irritation from the sap. The berries should be glossy black when ripe; any green ones contain toxic solanine, so never taste-test unripe fruit. Harvest in the morning when berries are coolest for maximum shelf life.
Pro Tips for Black Nightshade Solanum Nigrum
- Took me years of trial and error to master these secrets—here's how to avoid the common pitfalls and maximize your harvest.
- Soil Prep Secret: The key to successful nightshade cultivation lies in that initial soil preparation.
- Germination Strategy: Timing is everything when sowing those ½ inch deep seeds.
Frequently asked questions
Got questions about growing or harvesting Solanum nigrum? You’re not alone!
Here are some of the most common concerns—plus quick, practical answers to help you succeed with this fast-growing wild edible.
Is black nightshade safe to eat raw?
While the berries are edible when fully ripe (black and soft), the raw leaves and stems contain toxic solanine. Always cook leaves thoroughly (boiling or sautéing) to neutralize toxins. Start with small amounts to test for sensitivities—when in doubt, cook it out!
How long does it take for black nightshade to produce fruit?
From seed to ripe berries, expect 60–90 days in warm climates (Zone 5+). In cooler areas, growth slows—extend the season with row covers or start seeds indoors 4–6 weeks before the last frost. Pro tip: Plant in full sun (6+ hours/day) for faster fruiting!
Can I substitute black nightshade for spinach or eggplant?
Yes! Use the leaves like spinach (cooked) in soups, stir-fries, or pestos. The berries can replace eggplant in dishes like ratatouille or pickled as a tangy snack. Warning: Never use unripe green berries—they’re toxic! Ripe = jet-black.
What pests or diseases should I watch for?
Black nightshade is hardy but can attract aphids, spider mites, or fungal issues in humid conditions. Prevent problems with:
- Neem oil spray for pests (apply at dusk).
- Copper fungicide if leaves spot (early treatment is key!).
- Rotate crops to avoid soil-borne diseases.
Can I save seeds from store-bought black nightshade berries?
Technically yes, but store-bought berries may be hybridized or treated to prevent germination. For reliable seeds, grow from open-pollinated varieties or harvest seeds from wild plants (ensure they’re from a non-sprayed area). Save seeds by:
- Scooping out pulp from ripe berries.
- Drying seeds on paper towels for 3–5 days.
- Storing in a cool, dark jar for up to 2 years.
Wrapping up and next steps
Growing black nightshade (Solanum nigrum) is a rewarding adventure—packed with nutritional benefits, ease of cultivation, and the thrill of harvesting a wild edible in just 60 days!
Whether you're a beginner or a seasoned gardener, this resilient plant proves that sustainable, low-maintenance gardening is totally within reach. 🌱
Ready to take the next step? Start by planting a small batch in your garden or even a container—experiment with flavors in your favorite dishes, and share your harvest with fellow plant enthusiasts. Your green thumb (and taste buds!) will thank you.