
Tools
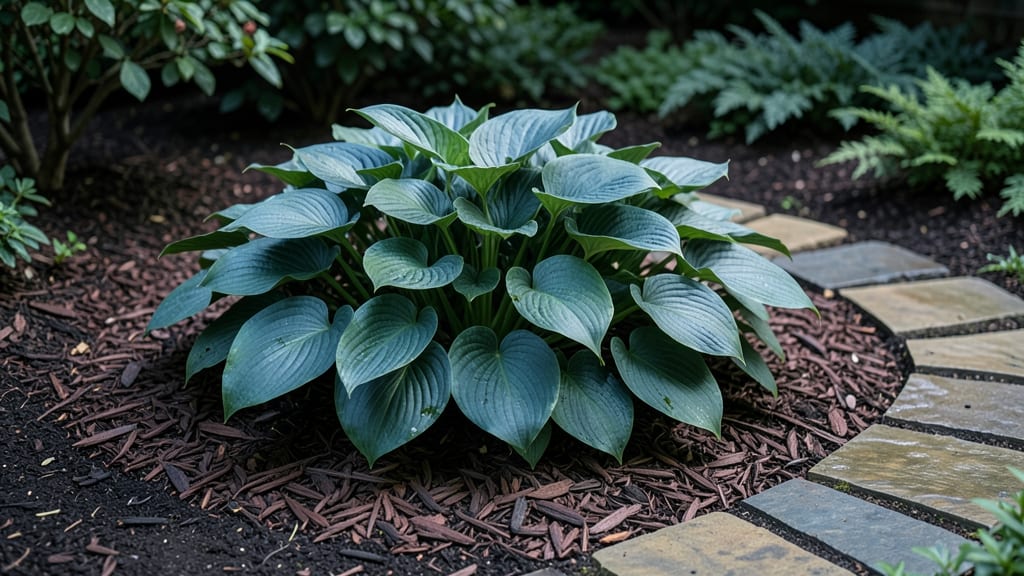
A pre-planned shade garden transforms dappled corners into lush escapes that outshine sun-drenched plots. 🌿 I designed mine after struggling with patchy grass and sad hostas—until I discovered how layered planting keeps color and texture alive all year.
The key? Mixing evergreens for structure, spring bulbs for early blooms, and shade-loving perennials that thrive without fuss.
Start with the backbone: ferns, hellebores, and Japanese painted ferns anchor the space, while hostas and astilbes add height and drama. Underneath, liriope and sweet woodruff create a living carpet that stays green even when others fade.
For pop, tuck in bleeding heart and foamflower—both bloom when most shade plants take a break.
By summer, your garden won’t just survive—it’ll outperform brighter spots. The trick is moisture retention: mulch heavily with shredded bark to keep roots cool, and group plants with similar water needs. A drip irrigation line buried under mulch makes maintenance effortless, so you’re not hauling hoses every week.
This design works for cottage charm (add lavender and roses) or modern minimalism (stick to monochromatic foliage). Just avoid overcrowding—shade plants spread slowly, but they’ll fill in beautifully over time. Ready to turn that shady corner into your garden’s star?
📚 In This Guide
- What you need
- Instructions
- Tips and common mistakes
- Wrapping up and next steps
What you need
- ● Shade-tolerant plants: 10–20 plants (mix of perennials, annuals, and foliage): 5–7 Hostas (e.g., 'Blue Angel' or 'Halcyon')
- ● 3–5 Ferns (e.g., Matteuccia struthiopteris)
- ● 2–3 Heucheras (e.g., 'Palace Purple')
- ● 2 Astilbes (e.g., 'Fanal')
- ● 1–2 Hydrangeas (e.g., 'Annabelle')
- ● 1 Japanese Painted Fern (for texture)
- ● Soil amendments: 5–10 lbs compost (for nutrient-rich soil)
- ● 2–3 lbs peat moss or coconut coir (for moisture retention)
- ● 1 lb slow-release fertilizer (10-10-10 ratio)
- ● Mulch: 2–3 bags shredded bark or pine straw (to retain moisture and suppress weeds)
- ● Containers (if needed): 3–5 10–15 gallon pots (for flexibility in placement)
- ● Digging tools: 1 garden trowel (for small plants)
- ● 1 garden fork or spade (for amending soil)
- ● Planting helpers: 1 hand pruners (for trimming)
- ● 1 watering can or hose with nozzle (gentle watering for shade plants)
- ○ Optional (but handy!): 1 soil pH tester (to check acidity levels)
- ● 1 wheelbarrow (for moving soil/amendments)
- ● 1 knee pad (for comfort)
- ● Location assessment: Measure your shade area (full, partial, or dappled light?) and note moisture levels.
- ○ Soil test (optional but recommended): Check for drainage and nutrient deficiencies.
- ● Design plan: Sketch a layout (use graph paper or a free app like Garden Planner).
- ● Timing: Plant in spring or early fall for best root establishment.
Step-by-Step guide to designing a thriving pre-planned shade garden
Here's how to create a layered, low-maintenance shade garden that blooms and thrives year-round.
🌿 Step 1: Analyze Your Shade Conditions
First, observe your shade patterns throughout the day. Note whether your area receives dappled shade (filtered sunlight), partial shade (3-6 hours of sun), or full shade (no direct sunlight). I recommend using a light meter app for 24 hours to track intensity—this determines which plants will thrive. For example, ferns and hostas handle full shade beautifully, while impatiens and astilbes prefer partial shade.
Mark the space with stakes to visualize plant layers: tall backdrops (6-8 feet), mid-height accents (3-5 feet), and ground covers (under 2 feet). This structure creates visual depth and prevents weeds from stealing nutrients. I always sketch my design first—it saves time and prevents costly mistakes when planting.
🪴 Step 2: Select Plants for Year-Round Interest
Choose plants that offer seasonal texture and color to keep your garden vibrant. For spring, incorporate bleeding hearts and heuchera (coral bells) for delicate foliage. Summer thrives with hydrangeas and astilbes, while fall and winter shine with evergreen ferns and ornamental grasses like carex. I prioritize native species—they’re hardier and require less care.
Group plants with similar water needs together. For instance, hostas and astilbes prefer consistently moist soil, while sedum and lamium tolerate drier conditions. This zoning prevents overwatering or underwatering. Always check the USDA hardiness zone for your area to ensure plants survive winter temperatures—this is non-negotiable for long-term success.
☀️ Step 3: Prepare the Soil for Low-Light Conditions
Shade gardens need nutrient-rich, well-draining soil to compensate for limited photosynthesis. Amend your existing soil with 3 inches of compost and 1 part peat moss or coconut coir to improve moisture retention. I also mix in slow-release organic fertilizer to provide steady nutrients. Test your soil’s pH—most shade plants prefer slightly acidic to neutral (6.0-7.0).
For heavy clay soil, incorporate sand or perlite to break up compaction. If your soil drains poorly, create raised beds with a gravel base to prevent root rot. Mulch with 3-4 inches of shredded bark or leaves to retain moisture and suppress weeds. This step is critical—poor soil prep leads to stunted growth and disease.
🌱 Step 4: Plant in Layers for Maximum Impact
Start with tall plants at the back, like arum lilies or foxglove, to anchor the design. Place mid-height plants—such as heuchera or coral bells—in the middle layer. Finish with ground covers like ajuga or lamium to fill gaps and prevent weeds. Space plants based on their mature size: 2-3 feet apart for shrubs, 1-2 feet for perennials.
Dig holes twice as wide as the root ball but no deeper. Gently loosen roots if pot-bound and backfill with native soil mixed with compost. Water deeply to settle the soil and eliminate air pockets. I always plant on a cool, overcast day to reduce transplant shock—this gives plants a gentler introduction to their new home.
💧 Step 5: Maintain for Long-Term Success
Water deeply once a week (or more in extreme heat) to encourage deep root growth. Shade plants often suffer from root rot if overwatered, so always check the top 2 inches of soil—water only when dry. Fertilize lightly in early spring with a balanced organic fertilizer (10-10-10) to support new growth.
Prune spent blooms regularly to encourage continuous flowering and remove any diseased or damaged foliage. In late winter, divide overcrowded perennials like hostas or astilbes to rejuvenate their vigor. This garden is designed to thrive with minimal effort, but these small checks keep it looking its best for years.
Tips & tricks for perfecting your low-light garden design
These insider strategies will help you create a shade garden that not only survives but truly thrives, with minimal effort and maximum visual impact.
Layering Secret: When visualizing your plant layers in Step 1, consider using 3-6 feet as your mid-height range rather than just 3-5 feet. This extra foot gives you more flexibility to incorporate plants like tiarella or foamflower that add delicate texture without overwhelming the design. I find this subtle adjustment creates more visual interest in the middle layer while maintaining balance. The key is to think vertically—taller plants should never block light from reaching lower layers.
Plant Selection Strategy: In Step 2, when choosing plants for partial shade (those 3-6 hours of sun), prioritize plants with variegated foliage like Japanese painted fern or golden Japanese honeysuckle. These varieties add instant visual contrast and perform exceptionally well in transition zones. For full shade areas, I recommend adding 1-2 evergreen shrubs like inkberry holly or dwarf rhododendron—they provide year-round structure that other plants can't match.
Soil Prep Upgrade: For Step 3's soil preparation, consider adding 1 part worm castings to your compost mix for an extra nutrient boost. The 3 inches of compost recommendation is perfect, but worm castings provide readily available nutrients that shade plants—especially those in full shade—can utilize immediately. I've seen a noticeable difference in early spring growth when using this combination. Also, if your area experiences heavy rainfall, add 10% more perlite to your mix to improve drainage without sacrificing moisture retention.
Planting Day Pro Tip: When you're ready to plant in Step 4, prepare your holes the night before if possible. Soak them with water and let them drain completely. This pre-watering creates an ideal planting environment and reduces transplant shock. For container plants, give them a thorough drink 1 hour before transplanting to ensure they're well-hydrated. I've found this simple preparation makes all the difference in establishing healthy root systems, especially for shade plants that are more sensitive to stress.
Pro Tips for Pre Planned Shade Garden
- These insider strategies will help you create a shade garden that not only survives but truly thrives, with minimal effort and maximum visual impact.
- Layering Secret: When visualizing your plant layers in Step 1, consider using 3-6 feet as your mid-height range rather than just 3-5 feet.
- Plant Selection Strategy: In Step 2, when choosing plants for partial shade (those 3-6 hours of sun), prioritize plants with variegated foliage like Japanese painted fern or golden Japanese honeysuckle.
Frequently asked questions
What are the best plants for a pre-planned shade garden?
A pre-planned shade garden thrives with layered plants like hostas, ferns, and astilbes for mid-height, plus shade-tolerant shrubs (e.g., hydrangeas or boxwoods) and ground covers (e.g., pachysandra or ivy). For year-round interest, add evergreen options like hemlock or Japanese holly. Pro tip: Mix textures (leathery, feathery, or variegated leaves) for visual depth!
When is the ideal time to plant a pre-planned shade garden?
Plant in early spring or fall when soil is workable but not frozen. Avoid summer heat or winter cold, which stress plants. For container gardens, you can plant anytime—just water deeply and mulch to retain moisture. Fall planting gives roots time to establish before winter!
Are pre-planned shade gardens more expensive than DIY?
Upfront costs may be higher for pre-planned kits (typically $50–$200+), but they save time, reduce waste, and often include mulch/fertilizer. DIY can be cheaper if you source plants locally or propagate your own. Factor in long-term savings: Pre-planned designs mature faster with less trial-and-error!
How do I troubleshoot poor growth in a shade garden?
Yellowing leaves? Check for overwatering or root rot (lift a plant to inspect). Leggy stems? Your garden may need more light (e.g., dappled sun) or fertilizer (use slow-release shade formulas). Adjust mulch depth—too much can suffocate roots!
Can I add perennials to a pre-planned shade garden later?
Fill gaps with shade-loving perennials like bleeding heart, lungwort, or foamflower. Space them 12–18 inches apart and water deeply for the first 2 weeks. Avoid overcrowding—pre-planned designs account for mature plant sizes!
Wrapping up and next steps
A pre-planned shade garden isn’t just a backup plan—it’s a thriving, low-maintenance sanctuary that delivers beauty and productivity year-round. By layering evergreens, perennials, and seasonal blooms with strategic spacing, you’ve unlocked a space that outperforms in shade while requiring minimal effort.
The key? Confidence in your design and a willingness to experiment with textures, colors, and heights.
Now that you’re armed with the tools, tips, and troubleshooting to bring your vision to life, it’s time to roll up your sleeves! Start small—sketch your first layer, gather a few plants, and watch your shade garden transform into a lush, dynamic oasis. Happy gardening! 🌿✨