Companion Plants
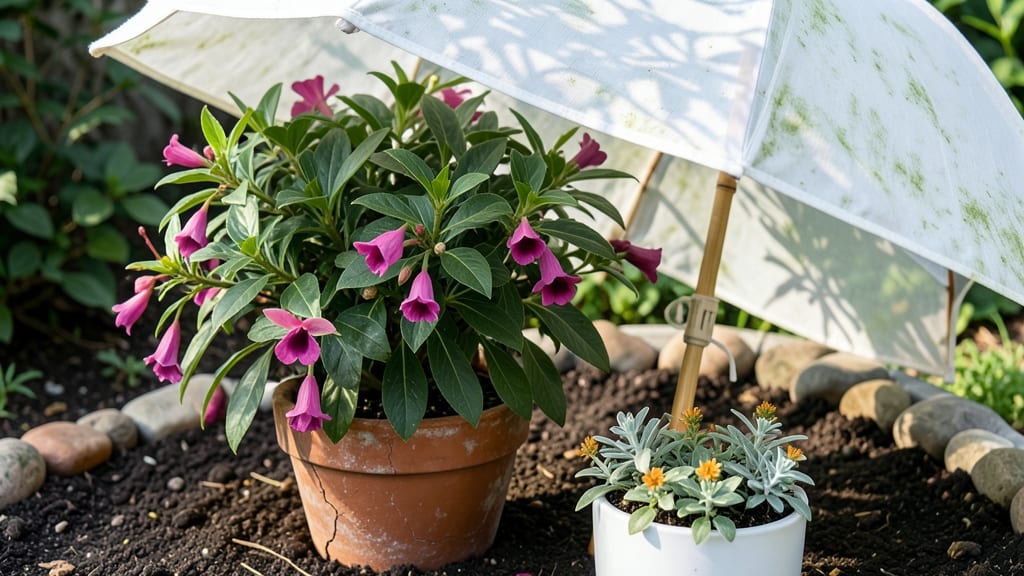
A DIY shade umbrella for plants transforms sun-scorched spots into thriving, cool retreats—no store-bought hacks needed. 🌿 I built mine from an old patio umbrella and some breathable fabric, and now my heat-sensitive ferns thrive where they’d otherwise crisp by noon.
The best part? You can customize it to match your garden’s vibe while keeping plants happy and pests at bay.
Start with a sturdy base—bamboo poles or a metal umbrella frame works best—and cover it with lightweight fabric like shade cloth or even repurposed curtains. For adjustable shade, add a pulley system so you can fine-tune coverage as the sun shifts.
Think of it as a sun hat for your plants: too much direct light? Pull it down. Need airflow? Loosen it up. It’s that simple.
What you’ll end up with is a cool, shaded sanctuary where delicate leaves stay lush and vibrant, and you avoid the sad, wilted look of plants fighting for survival. Plus, it adds a cozy, intentional touch to your garden—like a little canopy for your sun-shy favorites.
The payoff? Stronger growth, fewer pests, and a space that feels designed just for them.
Works for containers, raised beds, or in-ground plants—just adjust the height and fabric type based on your climate. A little creativity goes a long way, and before you know it, you’ll have a customized shade solution that’s both functional and stylish. Ready to get started?
📚 In This Guide
- What you need
- Instructions
- Tips and common mistakes
- Wrapping up and next steps
What you need
- ● Umbrella (1) – Choose a lightweight, weather-resistant fabric umbrella (60–90 inches wide) with a sturdy handle and adjustable ribs.
- ● Scissors or utility knife (1) – For trimming fabric or mesh.
- ● Lightweight shade cloth or mesh (1 yard) – Opt for 30–50% UV-blocking material (e.g., Agribon or LumaShade).
- ● Measuring tape (1) – To ensure precise cuts and fit.
- ● Strong fabric glue or stitching thread (1 bottle/roll) – For securing the shade cloth to the umbrella.
- ○ Staple gun + staples (1) – Optional but helpful for extra reinforcement.
- ● Small eye hooks or carabiners (2–4) – To attach the umbrella to a hook or stake.
- ● Heavy-duty outdoor rope or bungee cords (1–2) – For anchoring the umbrella to a post or trellis.
- ● Decorative trim or ribbons – For a garden-friendly aesthetic.
- ● Waterproof sealant spray – To extend the umbrella’s lifespan.
- ● Adjustable garden stakes (2) – For freestanding setups.
- ● LED string lights (1 strand) – For evening ambiance (battery-powered!).
Step-by-Step instructions for building a DIY shade umbrella
Here's my go-to method for creating sturdy, customizable shade that protects delicate plants while adding style to your garden.
🪴 Step 1: Gather Materials and Measure Your Space
Start by measuring the diameter of the area you want to shade. Most gardeners choose a 4-foot diameter for small beds or 6-foot for larger sections. I like to use a 5-foot diameter for medium-sized containers or flower beds—it gives enough coverage without blocking neighboring plants completely.
For materials, you'll need a sturdy wooden dowel or PVC pipe (at least 6 feet tall) as your central post, plus 4-6 lightweight shade cloth panels (or even old bedsheets in a pinch). Grab some zip ties or garden twine to secure everything, and a measuring tape to ensure even spacing. Don't forget a level—this keeps your umbrella stable and prevents wobbling in wind.
✂️ Step 2: Cut and Prepare Your Shade Panels
Cut your shade cloth (or fabric) into triangle-shaped panels—each should measure about 3 feet at the base and 6 feet at the top if using a 5-foot diameter umbrella. For a 4-foot diameter, scale down to 2-foot bases and 4-foot tops. I fold the edges over twice and secure them with stitching or heavy-duty staples to prevent fraying.
If you're using multiple panels, make sure they overlap slightly at the edges when assembled. This creates a seamless, professional look while keeping sunlight out effectively. Test-fit them around your dowel before securing—you'll want the panels to fan out evenly without gaps. Real talk: if a panel feels too stiff, trim the edges slightly to improve flexibility.
🌿 Step 3: Assemble the Umbrella Frame
Insert the top of each panel into a 1-inch slit you've cut near the top of your dowel. Space them evenly around the post—think of it like slicing a pie, with each panel taking up an equal share of the circle. Use zip ties to secure the panels to the dowel, tightening them just enough to hold without crushing the fabric.
For extra stability, tie a horizontal support ring (made from a flexible wire or another dowel) about 2 feet down from the top. This prevents the panels from flapping in windy conditions. Bury the dowel 6 inches deep in the ground or anchor it to a heavy base (like a brick or concrete block) to keep it upright. You'll know it's secure when a gentle push doesn't make it wobble.
☀️ Step 4: Adjust and Test Your Shade
Once assembled, position your umbrella over the plants you're protecting. Step back and check for even coverage—you should see consistent shade without harsh shadows creeping in from the sides. If gaps appear, adjust the panel angles slightly or add an extra panel for fuller coverage.
Test it on a sunny day by moving plants around underneath. You'll notice some varieties (like ferns or impatiens) thrive in dappled shade, while others (like coleus) prefer full, even shade. If leaves start yellowing after a few days, your umbrella might be blocking too much light—try lifting the panels slightly or moving it farther away.
🔄 Step 5: Maintain and Modify as Needed
Check your shade umbrella every 2-3 weeks for signs of wear. If panels sag or fabric tears, reinforce them with additional zip ties or stitching. In windy areas, consider adding guylines (thin ropes tied to stakes) to keep the structure steady. I also like to rotate the umbrella quarter-turn weekly to prevent uneven sun exposure on one side of plants.
For seasonal adjustments, remove the umbrella entirely during fall and winter if your plants need more light. Store the panels flat in a dry place to prevent mildew. If you notice pests (like spider mites) thriving under the shade, give the area a light spray of water to deter them—this keeps your plants healthy without harsh chemicals.
Tips & tricks for perfect DIY shade umbrella
Here's what I've learned after building these for my own garden—simple fixes that make all the difference.
Material Selection: For the central post, I recommend PVC pipe over wooden dowels if you're in a damp climate. PVC won't rot or warp over time like wood can, and it's lighter to handle. If using wood, treat it with outdoor sealant first—this prevents moisture damage that can weaken your structure in just a few months. The shade cloth panels don't need to be expensive; even lightweight bedsheets work in a pinch, though they won't last as long as purpose-made shade fabric.
Panel Cutting Precision: When cutting your triangle panels, use a metal ruler and fabric scissors for clean edges. I mark my measurements with a fabric marker first—this prevents mistakes when you're working with multiple panels. For the 5-foot diameter umbrella, cut the base measurement first, then fold the fabric to mark the 6-foot top point. This ensures all panels match perfectly when assembled. If you're using old bedsheets, pre-wash them first to prevent shrinkage after assembly.
Wind Resistance Strategy: The 2-foot support ring mentioned in Step 3 is my secret for preventing wind damage. I reinforce it with a second ring at 3 feet down for extra stability in breezy spots. For high-wind areas, add guylines immediately after assembly—these thin ropes tied to stakes prevent the umbrella from collapsing. I also recommend burying the post deeper (8-10 inches) in loose soil rather than just 6 inches for better anchoring.
Seasonal Adjustments: Don't forget you can modify your umbrella's shade intensity by adjusting panel height. In early spring or late summer when plants need partial sun, raise the panels slightly to create dappled shade. For full sun protection, lower them completely. I also keep a spare set of panels on hand—swapping them out seasonally extends the life of your materials while giving plants exactly what they need at each growth stage.
Pro Tips for Diy Shade Umbrella For Plants
- Here's what I've learned after building these for my own garden—simple fixes that make all the difference.
- Material Selection: For the central post, I recommend PVC pipe over wooden dowels if you're in a damp climate.
- Panel Cutting Precision: When cutting your triangle panels, use a metal ruler and fabric scissors for clean edges.
Frequently asked questions
Got questions about crafting your own DIY shade umbrella for plants? You're not alone! Here are some common concerns and quick answers to help you get started with confidence.
What’s the best material for a DIY shade umbrella?
A lightweight, breathable fabric like shade cloth (30-50% block) or cheesecloth works best—it filters sunlight while allowing airflow. Avoid plastic sheets, which trap heat. For a stylish touch, use burlap or cotton, but secure them tightly to prevent sagging.
How long does it take to make one?
Most DIY shade umbrellas take 30-60 minutes if you have pre-cut fabric and a sturdy frame. Rush jobs? Opt for a pre-made umbrella base (like a patio umbrella) and just drape fabric over it—cutting time in half! Plan for extra time if you’re sewing or customizing the design.
When is the best time to use a shade umbrella for plants?
Use it mid-morning to mid-afternoon (10 AM–4 PM) when the sun is harshest. For tropical plants or seedlings, provide shade all day until they acclimate. Gradually reduce shade over weeks to toughen them up—like giving your plants a sun vacation!
Can I reuse or repurpose materials?
Upcycle old patio umbrellas, thrifted curtains, or even scrap fabric from sewing projects. Just ensure materials are UV-resistant. Avoid treated fabrics (like some outdoor furniture covers) that may leach chemicals into the soil.
How do I keep pests away from shaded plants?
Shade umbrellas can create humid microclimates, attracting fungus gnats or powdery mildew. Improve airflow by raising the umbrella slightly off the ground or adding small gaps in the fabric. Water plants at the base (not overhead) and remove fallen leaves regularly.
Will a shade umbrella protect plants from frost?
No—shade umbrellas block sunlight, not cold. For frost protection, use row covers or frost blankets instead. However, a shade umbrella can help slow morning frost damage by reducing temperature swings (but remove it before nighttime freezes).
Still stumped? Drop your question in the comments—we’re happy to help your green thumbs thrive!
Wrapping up and next steps
Creating a DIY shade umbrella for your plants is a simple, budget-friendly way to protect your sun-shy greens while adding a charming touch to your garden! 🌿 With just a few materials and a little creativity, you’ve got a practical solution that keeps your plants happy and thriving.
Whether you’re shielding delicate herbs, young seedlings, or tropical favorites, this project is your go-to for customized shade on the cheap.
Now that you’re armed with the know-how, grab your supplies and get crafting! Next, experiment with different fabrics, sizes, or even add a decorative edge to match your garden’s vibe. Happy gardening—your plants will thank you! 🌞✨