
Blooming
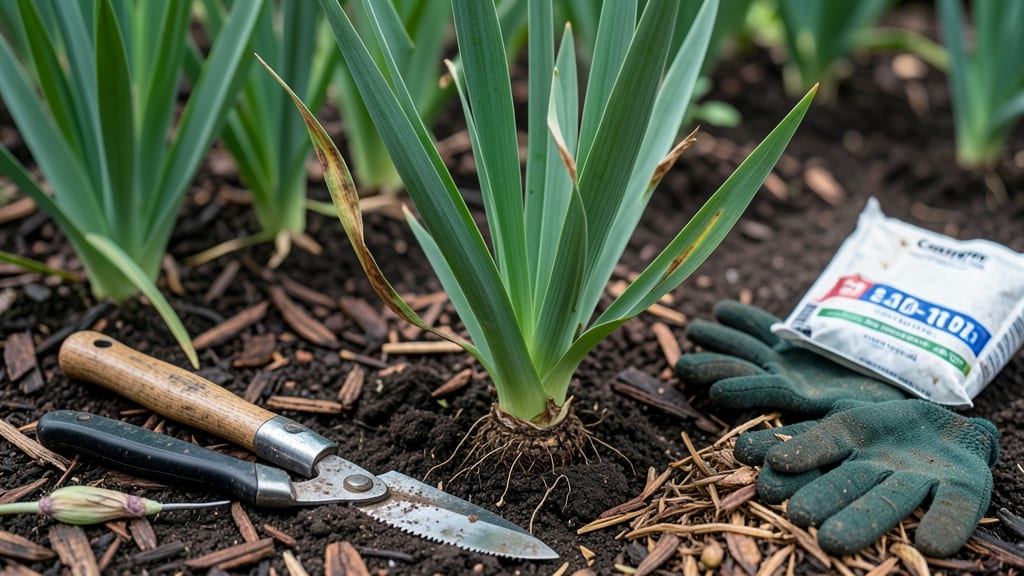
After your irises finish their stunning spring show, the real work begins. ✨ Proper after-bloom care transforms those floppy stalks into next year's showstopper—no more weak blooms or sparse foliage.
I've learned that skipping this step means fewer flowers by summer, but doing it right guarantees irises that multiply and thrive for decades. The secret starts with cutting back the flower stalks at the base once they yellow, leaving the fan-shaped leaves untouched.
This might feel counterintuitive, but those leaves feed the rhizomes underground. Then comes the feeding: a balanced fertilizer in early summer gives them the boost they need for next season's buds.
By late summer, you'll see new growth pushing up from the center—this is your cue to divide any congested clumps. Spread the divisions out, and you'll have more plants than you started with. The payoff? Irises that return year after year with bigger, bolder blooms than the first.
This method works for bearded, Siberian, and even reblooming varieties. The key is consistency—skip a year, and you'll notice the difference in flower quality. Let's get those irises ready for another spectacular show.
📚 In This Guide
- What you need
- Instructions
- Tips and common mistakes
- Wrapping up and next steps
What you need
- ● Pruning shears or sharp garden scissors – Clean, sterilized, and sharp for precise cuts (avoid dull blades that crush stems).
- ● Gloves – Heavy-duty garden gloves to protect hands from thorns and soil.
- ○ Pruning saw (optional) – For thick, woody stems that shears can’t handle.
- ● Compost or well-aged manure – 2–3 gallons per plant for mulching (avoid fresh manure—it can burn roots!).
- ● Slow-release granular fertilizer – High in phosphorus (P) and potassium (K), like a 5-10-10 blend (follow package rates).
- ● Mulch (straw, shredded leaves, or pine needles) – 2–3 inches thick to insulate roots in winter.
- ● Watering can or hose with a gentle spray nozzle – For deep, even hydration.
- ● Disinfectant (rubbing alcohol or bleach solution) – 1 part bleach to 9 parts water to sterilize tools between cuts.
- ● Burlap or landscape fabric – To wrap clumps in cold climates (Zone 5 and below).
- ● Garden twine or stakes – For securing burlap if winds are strong.
- ○ Thermometer (optional) – To monitor soil temps in extreme winters (ideal: above 20°F/-7°C).
Step-by-Step guide to revitalizing irises after bloom
Here's how to keep your irises thriving after their stunning spring display.
✂️ Step 1: Prune Faded Blooms and Seed Pods
Once the iris blooms fade completely, snip the spent flower stalks at the base with clean, sharp pruning shears. Don't leave any seed pods—those sap-sucking insects will find them like a buffet. I always cut just above the first healthy leaf to avoid damaging the rhizomes underneath.
Watch for the stalks to turn completely brown before pruning. If you cut too early, you'll remove potential energy storage for next year's blooms. The goal is to keep the foliage intact—those sword-like leaves are the plant's solar panels, storing energy for next season's flowers.
🌱 Step 2: Leave Foliage Until It Yellows Naturally
Resist the urge to trim the leaves after blooming—leave them until they turn completely yellow and flop over on their own. This process, called "yellowing," can take 6-8 weeks depending on your climate. The longer you leave the foliage, the more energy the rhizomes store for next year's blooms.
If you live in a hot, dry climate, you might see the leaves yellow faster. That's normal—just don't cut them until they're completely brown and crispy. I've seen irises bloom twice as many flowers the following year when I let the foliage stay until natural senescence.
💧 Step 3: Water Deeply and Reduce Frequency
After blooming, irises enter their dormant period and need less water. Reduce watering to once every 10-14 days unless you're experiencing extreme heat or drought. Water deeply—about 1 inch per week—to encourage strong root growth without promoting rot.
I always water in the early morning so the foliage has time to dry completely before nightfall. Wet foliage at night invites fungal diseases that can weaken your irises. You'll know you're watering correctly when the soil feels slightly damp 2-3 inches below the surface.
🌿 Step 4: Apply a Balanced Fertilizer in Early Summer
Feed your irises with a balanced 10-10-10 fertilizer in early summer when new growth appears. Sprinkle about 1/4 cup per plant around the base, keeping it 6 inches away from the rhizomes. Water immediately after applying to help distribute the nutrients.
This feeding boosts next year's bloom potential without encouraging excessive leaf growth. I've found that irises respond best to light, regular feeding rather than heavy doses. Avoid high-nitrogen fertilizers—they promote lush foliage at the expense of flowers.
⏰ Step 5: Prepare for Winter with Mulch and Protection
In fall, apply a 2-3 inch layer of mulch around your irises but not directly on top of the rhizomes. I use straw or shredded leaves because they break down slowly and provide insulation. This protects the rhizomes from extreme temperature fluctuations and keeps the soil moist through winter.
If you're in a zone with harsh winters (below 20°F), consider adding a thick layer of leaves or evergreen boughs on top of the mulch. The key is to keep the rhizomes from freezing and thawing repeatedly—which can cause fatal damage. In spring, remove the winter protection when you see new growth emerging.
Tips & tricks for perfect iris post-bloom care
Here's what I've learned after years of iris gardening—these little details make all the difference for next year's spectacular blooms.
Pruning Precision: When you're ready to cut those spent blooms in Step 1, use a clean pair of pruning shears and make your cuts at a 45-degree angle just above the first healthy leaf. This angled cut helps water run off and prevents rot from sitting on the rhizome. I've found that using sterilized shears reduces the risk of spreading fungal diseases between plants. The key is patience—wait until the stalks are completely brown before cutting, even if it means leaving them for a few extra days.
Yellowing Timeline: The 6-8 week yellowing period in Step 2 is your iris's way of storing energy for next spring. In cooler climates, you might need the full 8 weeks, while hotter regions can complete this process in as little as 4-5 weeks. Set a reminder in your calendar when you prune the blooms to track this timeline. I mark my garden calendar with colored flags so I don't accidentally trim too soon. The foliage should look crispy and completely dry before removal—if it still has any green, leave it be!
Winter Protection Strategy: For that critical 2-3 inch mulch layer in Step 5, I recommend using straw rather than shredded leaves if you're in a wet climate. Straw provides better insulation and won't compact when wet. In areas with temperatures below 20°F, I double up by adding a thick layer of evergreen boughs on top of the mulch—this creates an insulating blanket that can make the difference between survival and damage. Remember to remove this protection in early spring when you see new growth emerging, usually around late winter or early spring.
Pro Tips for Irises After Bloom Care
- Here's what I've learned after years of iris gardening—these little details make all the difference for next year's s...
- Pruning Precision: When you're ready to cut those spent blooms in Step 1, use a clean pair of pruning shears and make...
- Yellowing Timeline: The 6-8 week yellowing period in Step 2 is your iris's way of storing energy for next spring. In ...
Frequently asked questions
Got questions about keeping your irises thriving after their stunning bloom? You’re not alone! Here are some of the most common concerns—and expert answers—to help you care for your irises like a pro.
Do I need to cut back iris flowers after they bloom?
Yes! Once the blooms fade, snip the spent flower stalks right down to the ground. This prevents seed formation (which drains energy) and keeps your irises focused on next year’s growth. Just leave the fan-shaped leaves—they’re the plant’s food factory!
When is the best time to fertilize irises after blooming?
Wait until late summer or early fall (6–8 weeks after blooming) to fertilize. Use a low-nitrogen, high-phosphorus-potassium blend (like 5-10-10) to encourage root and rhizome strength. Avoid fertilizing in winter—irises rest then!
How do I winterize irises in cold climates?
In zones 5 and colder, mulch lightly (1–2 inches of straw or leaves) after the first hard frost to insulate rhizomes. Avoid heavy mulch—it can rot tender roots. In spring, remove mulch once new shoots appear (around March–April).
Can I divide irises after they bloom?
Divide irises 4–6 weeks after blooming (late summer) when foliage turns yellow. Wait too long, and you’ll miss the best time. Dig up rhizomes, separate clusters with a clean knife, and replant with the top third exposed to sunlight.
Why are my iris leaves turning yellow after blooming?
Yellow leaves can mean overwatering, fungal issues (like iris borers), or nutrient deficiency. Check for soggy soil and improve drainage. If borers are the culprit, remove infested rhizomes immediately and treat with neem oil or insecticidal soap.
What’s the deal with iris rhizomes—do I need to bury them?
Nope! Irises hate being buried. Plant rhizomes with the top third exposed to sunlight. Burying them too deep causes rot. Just mound soil around the sides and keep the crown above ground—like a tiny, sunbathing rock star!
Wrapping up and next steps
With these irises after bloom care secrets in hand, your garden will thrive for seasons to come! 🌸 Remember, the key is timing—prune wisely, feed consistently, and winterize with confidence. Your irises will reward you with bold blooms year after year.
Ready to put it all into action? Start by inspecting your plants this week—check for spent blooms, assess foliage health, and plan your fertilizer schedule. Happy gardening! 🌱